One of the things that I am trying – and mainly succeeding – for few years now, is to use my free time for the things other than computer science. It all comes down to three things basically: cooking, guitar playing, and tinkering with audio tech. And what time in the year could be better suitable for it than the festive season?
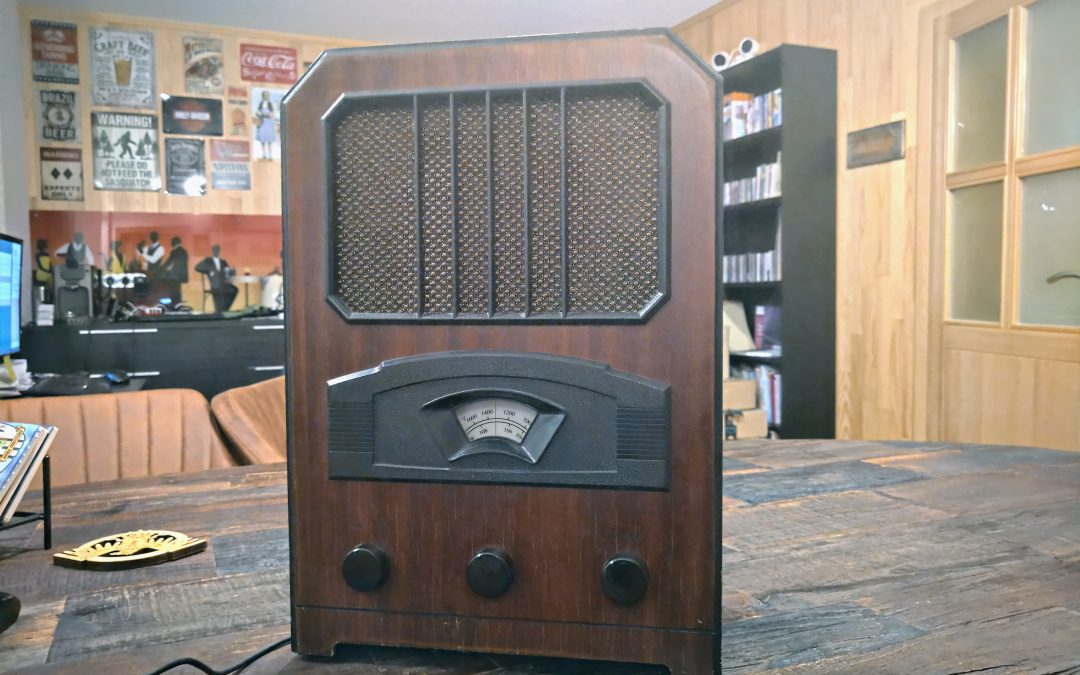
Two years ago, I have was trying to save the old Grundig Mandello from 1968, which is today proudly displayed (and functional!) in my home office. This year, I got hold on the “Nostalgia radio” from eighties, model PR-288E, built in Taiwan for German and Norwegian markets. If you think that retro/vintage is a fairly new phenomenon, you’re wrong! Basically the whole design of that radio was intended to remind on “Volksempfänger” devices from the 1930s in Nazi Germany, when the Nazi propaganda machinery decided that each household should have a radio (and later TV set), so the production of cheap radio and TV devices, affordable for average households, was encouraged and supported. The original Volksempfänger devices are on the market today for 250 or more Euros, which is way too much for a device with quite a crappy (tubes) amplifier and loudspeaker (crappy even for that time!). So, other than salvaging it somewhere for free, I am not planing on buying “the original”. I got this “eighties nostalgia radio replica” few months ago, for few Euros, so the Christmas time was the right time to take a look at what is inside.
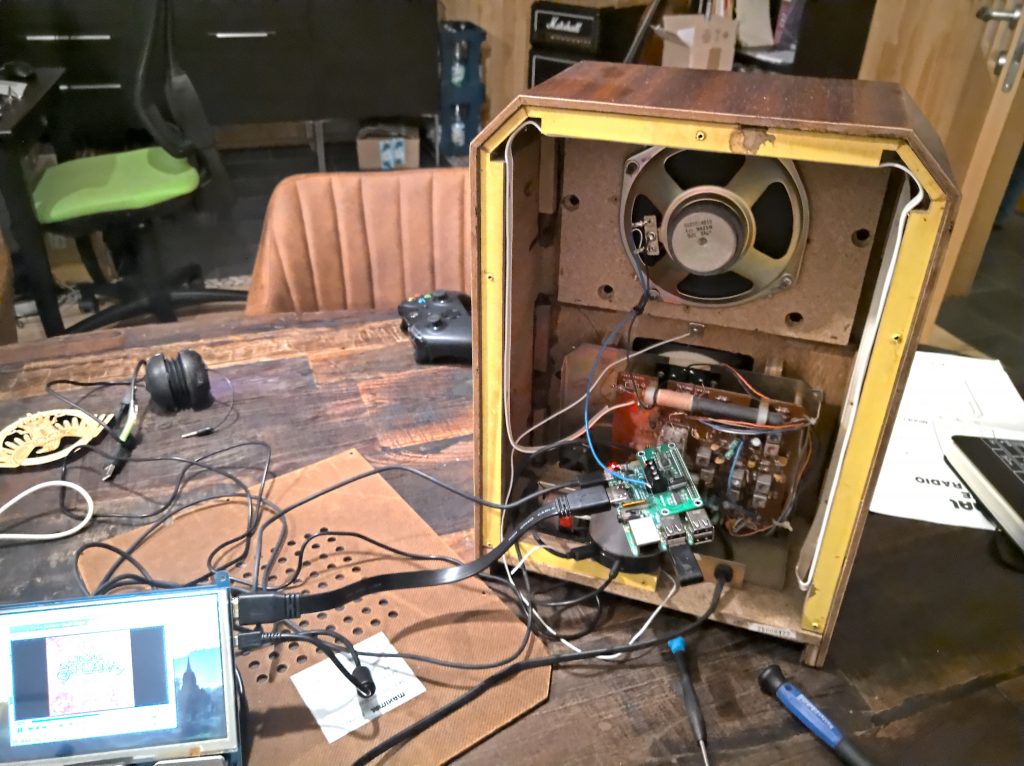
And it isn’t much what is inside! True to the spirit of the original, there was only an ok-ish speaker (the radio was mono only), and a not so good FM receiver and solid state (transistor) amplifier inside. Almost the only thing worthwhile saving was the chassis, but since it would be a very difficult task to find a replacement speaker which would fit perfectly inside, and since the speaker was kind of ok, I have decided to keep it. Everything else had to be taken out from that chassis. I think this model features the thinnest copper audio-cables that I’ve seen in my life – the whole device is so cheaply made that it was even kind of cute!

Since the loudspeaker was 4 Ω 5W, any “larger” Amp set would be an overkill, so it was an easy decision to go with Raspberry Pi supplemented with a HiFiBerry MiniAmp board. Connecting it altogether was a very simple process. I just wanted to see if all of this works together as planned – it did, I was getting sound from the loudspeakers. Yay – I could proceed!
The main question was what would it be used for? Answer to that question would determine what kind of software I’d put on the Pi. I have decided to make a standalone “modern party jukebox” as a present to a dear friend, which means this new device would not consume music from any UPnP or DLNA server, but it would rather have to be “transportable” and to “provide its own music” at parties. Which means, it would have to be both music server and music renderer. Now, finding such a solution for Pi is not an easy one – Pi is not a powerful beast! All Pi ports of the “major” products, such as Kodi (XBMC) or Plex are way too heavy for Pi (I have tried that in the past), so I was made aware of Mopidy, a lightweight and stable media server and renderer for Pi, and I have decided to give it a try.
Mopidy configuration was not an easy one, and to make it work, you need to think as a developer. Their documentation is there, but “sliced” and not coherently explained end-to-end. You need to make decisions such us do you want to run Mopidy as a service or in a context of current user (usually the Pi user), what kind of store you want to use for the album/tracks database (JSON? SQLite? Something else?), and to put it all together. If you choose to go with a service (what you should!), the link for the corresponding documentation was quite hidden, and – oh joy – the Mopidy configuration file from the /etc/ directory was only the bare bones, so I needed to manually create sections for storage, audio output, web extensions etc etc. The funniest part was configuring the storage: in my case, since storage was not preset in the configuration file, it was falling back to default – a JSON file. Since with 2000 albums, that JSON file was becoming way too much to handle (committing and flushing does not work with FileStream here, obviously), the Raspberry Pi would just die on me during the initial scan, after 3000 indexed songs or so. I had to find and to install the Mopidy extension which enables SQLite store, and then it kind-of worked, since Mopidy wouldn’t free up the in-memory cache, but it would at least commit to the DB after every 50 songs, so the next full scan would continue where the last one died out. I had to restart the scan eight times, but on the end, it worked.

In order to make it all work, you need to do following:
- On Raspberry Pi, install Raspbian Buster Lite image. This version of Raspbian does not have a desktop user interface, but you will not need one anyways.
- Attach and configure any DAC and/or AMP you want to use, in my case it was HiFiBerry MiniAmp. Make sure it is configured properly, check Pi and ALSA config files. Make sure it is able to play music before you proceed with Mopidy.
- Install SSH (you will want to access the Raspberry Pi from another machine) and SUDO (you will want to allow access to external users to update the music library later).
- Install Mopidy:
- Basic install: https://docs.mopidy.com/en/latest/installation/raspberrypi/#how-to-for-raspbian
- Configure mopidy to run as a service:
https://docs.mopidy.com/en/latest/running/service/#service
Pay attention on creating appropriate users, and giving them appropriate permissions on the folders where you have stored the music which needs to be scanned.
- Configure Mopidy to run with SQLite instead with the JSON file. I was using the special SQLite extension for that, but while I was tinkering with it, the Mopidy team has (yesterday!) deprecated that extension, and merged the SQLite into their “local” extension. Furthermore, Mopidy documentation seems to have a few burps at the moment, and half of the documents are not accessible, other than through Google-Cache, so you will have to search for yourself how to do it – I am not able to find that link anymore. This is what I mean when I say that there is no authoritative end-to-end configuration manual or documentation, a lot if it is simply tinkering, try and error.
- Configure the appropriate audio device in Mopidy config file – this is not done automatically for you. Often will “output = alsasink” in the section of your Mopidy config file be enough, if your audio has been set correctly (proper default audio card etc), but it is known to cause the configuration problems (I didn’t have any problems with it, though).
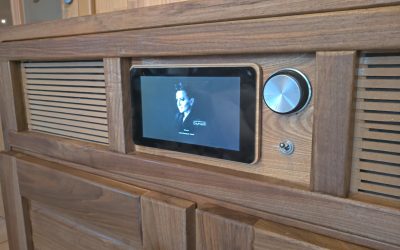
- Add all the additional extensions you want/need. I have added TuneIn audio extension, so I am able to play radio stations on the “Nostalgia Radio”.
- Run the full scan of your audio files. Note, if your music library is anything more than few albums, you will necessarily have to have SQLite enabled, and you will still probably need few runs to index it all.
- Add Iris extension. It adds a beautiful web interface for media browsing, playback and basic server actions.
https://mopidy.com/ext/iris/
- Test it all. If it works, you are fine.
It took me 4 hours to get to this point. Dear Mopidy people, if you ever get to read this: You have built a VERY GOOD software. But please, please, make the documentation reading and navigating a bit more pleasant experience. Include few end-to-end scenarios for few different use cases. Pretty please 🙂
- Basic install: https://docs.mopidy.com/en/latest/installation/raspberrypi/#how-to-for-raspbian
After I got Mopidy working, and after Iris web interface was playing music in the way I wanted, it was time to close the box.

Before I closed it “for good” (as we all know, there is NO “for good” in tinkering projects), I made sure to plug in a wireless USB keyboard and mouse stick into Pi, and to leave a HDMI out on the back of the Nostalgia radio (HDMI Out can be pushed inside and pulled out again – see the photo above). You never know when will you need to plug a monitor to it, for whatever reason it might be 🙂 (who has ever heard of repairing the Linux installations, right?)

The last piece of the puzzle was the controller software. Yes, you can navigate to Iris from your phone/tablet, but a controller mobile App would be a good idea!
For Android, there is “Mopidy Mobile” app, which really works well, and lets anyone who’s on the network browse, search and play the music!
https://play.google.com/store/apps/details?id=at.co.kemmer.mopidy_mobile&hl=en_US
There are more apps and clients, for web, Android and iOS on this link:
https://mopidy.com/ext/

So there it is. The juke box is finished, assembled, and working! You can put it any room, and as long as people are on the same network, they’ll be able to queue the songs, to listen to the music, and have their fun!
I am pretty sure that the person for whom this is intended as a present will have to open it few more times to “do stuff” (repair it!), but – luckily – that will not be my problem anymore 🙂 Until then, I’ll assume that it just works. 🙂
Happy Holidays everyone!